
Mini MOT checks
Blowing exhaust and tie bar rod problems
Click on the images to enlarge
After replacing my front suspension I realised that my Mini was due for an MOT in a few weeks. I started to panic because I believed that there was a lot to do and in such a short time-frame. Plus, having overhauled the steering recently, as well as doing the suspension, the geometry was out and the front wheels looked like they had a positive camber!
After calming down I grabbed the Haynes manual and turned to the MOT section in the back. I slowly worked through the Mini pre MOT checks and noted 6 points that I figured the Mini would fail on. I went online and ordered all the parts I figured I would need.
Blowing exhaust problems - exhaust repair with sealer
One job was fairly simple, the exhaust was blowing. My sister had bought me some car ramps for Christmas (I got them early) so I christened them by driving the Mini up them and left the engine running.
I gave my partner a piece of cardboard to hold over the end of the exhaust (rags rarely work adequately) but the engine kept on happily running. Not a good sign.
I soon located the problem, the exhaust mounting bracket that holds the front down-pipe to the exhaust manifold was loose.
This bracket is a pain to get at. You need to remove the air filter housing from the carb to allow access. It also helps if you have suitable portable lighting.
Roll the car off the car ramps and roll a trolley jack under the car and position it beneath the exhaust down pipe. Jack up the trolley until it touches the exhaust. Working under the bonnet, remove the exhaust bracket and let the exhaust sit on the trolley jack.
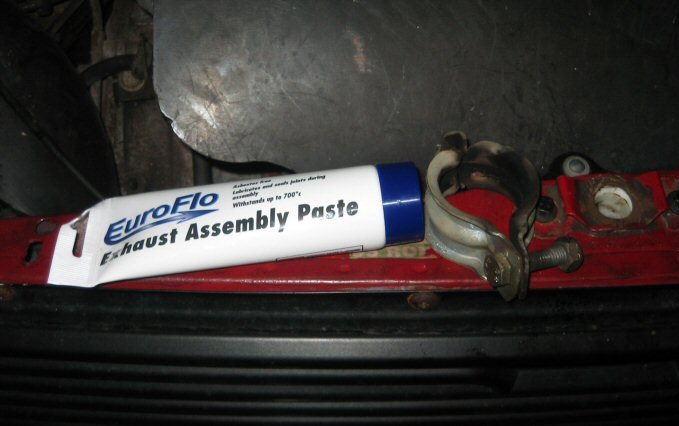
I cleaned up the bracket which was covered in soot, as well as the exhaust manifold and exhaust ends. I purchased some exhaust sealer (not repairer) and smothered it on my fingers and worked it around the ends of the exhaust manifold and exhaust down pipe where they fit together. I also smothered the inside rim of the bracket with the stuff.
I then jacked up the trolley jack until the exhaust was slotted over the end of the exhaust manifold. Then it's just a case of putting the exhaust bracket back around the joined exhaust/manifold and tightening it up as much as you can by hand. Then clean that hardening paste off your fingers! Yuck.
I gave it a few minutes then ran the engine for a while to heat up the paste. Afterwards I had my partner hold the cardboard to the exhaust again and after a few seconds the engine almost spluttered and died. Excellent!
Tie bar rod problems - fitting new tie bar rubber bushes
Another easy job (or so I thought) was replacing worn/missing tie bar rubber bushes on the front right of the car. You undo the nut at the front, remove the tie bar rubber bush and washers, then remove the bolt at the rear.
Now the bolts at the back of tie bar rods that hold the tie bar rod onto the lower suspension arm get covered in all the dirt, muck, water, and road salt that gets thrown up at them from the road. So it was no surprise when the nut sheared off the bolt when I was attempting to remove it. This I didn't need.
I tried everything to get what was left of this bolt out, to no avail. Using a hammer and drifts, copious amounts of WD40, heat, and even cursing did not free it. I tried hammering from the top, then bottom, but it only pancaked the bottom of the bolt forcing me to angle-grind it off.
At this point it's fair to say that I gave up after much cursing. I figured I could drive the car two miles down the road to a garage and let a professional deal with it. We all have those moments which I like to refer to as a 'Lethal Weapon moment'. Where you give up cursing and swearing, sigh, look at the problem, and mutter "I'm too old for this shit".
The next morning I phoned around some garages only to be told that they were all busy until the new year. Bugger. I'd booked the MOT already so it was down to me now.
I sprayed the bolt with WD40 and went to work. When I got home I sprayed it again and had some tea. Later, I went back out to the garage determined to sort it myself.
I'd like to say that it went smoothly but it didn't. After much braying with a hammer, it finally shifted. It was only a small movement but it gave me the encouragement I needed to keep at it. I finally got the old bolt out, cleaned up the tie bar rod, fitted the new nut and bolt, fitted the new tie bar rubber bushes, and put everything back together.
The Mini MOT results
So now there were 4 possible things that the car could fail on. I took it into the MOT and it failed, predictably, but not on any of the 4 points I figured it would fail on. It failed with worn front pear-shaped subframe mounts and a dodgy nearside full beam. The latter turned out to be a dodgy connector, the former took the garage less than an hour to fix and about three quid in parts. My Mini now had another years MOT!
Although it didn't fail on the 4 points I had identified (or surprisingly, the high suspension and altered geometry) I had ordered the parts I needed so I will fix these minor problems myself.
The garage didn't rip me off on parts or labour costs, and offered a free re so I'll be using them next year.
Did you enjoy this article or find the information useful? Help keep Dave and his articles online by keeping him fed with coffee by clicking the link below. Cheers!

Next page - Fitting alloy wheels and performance tyres to your Mini
Previous page - Fitting an adjustable suspension
Back to the Mini Project Main Menu

This website uses cookies. Click here to learn more about how and why we use cookies.